Do you feel that sharp, nagging ache right at the bottom of your kneecap?
Maybe it shows up every time you go for a run, land from a jump, or push through a set of squats.
You can probably point to the exact spot with one finger.
If this sounds familiar, you’re not just imagining things. Your patellar tendon is trying to send you a very clear message.
This isn’t just some random “bad knee” pain. It’s a specific issue with the powerful tendon that connects your kneecap to your shin bone, and it has a name: Patellar Tendinopathy, often called “Jumper’s Knee.”
But here’s the good news: it’s incredibly common, and more importantly, it’s fixable.
You don’t have to give up the activities you love.
In this guide, we’ll unravel why it’s happening and give you a clear, phase-based physiotherapy plan to calm the pain, rebuild your strength, and get you back to moving with confidence.
Let’s start by clearing up some common (and unhelpful) myths.

Myth vs. Fact: Understanding Your Knee Pain
What you think is happening with your knee pain can drastically change how you treat it. Getting this right is the first step to getting better.
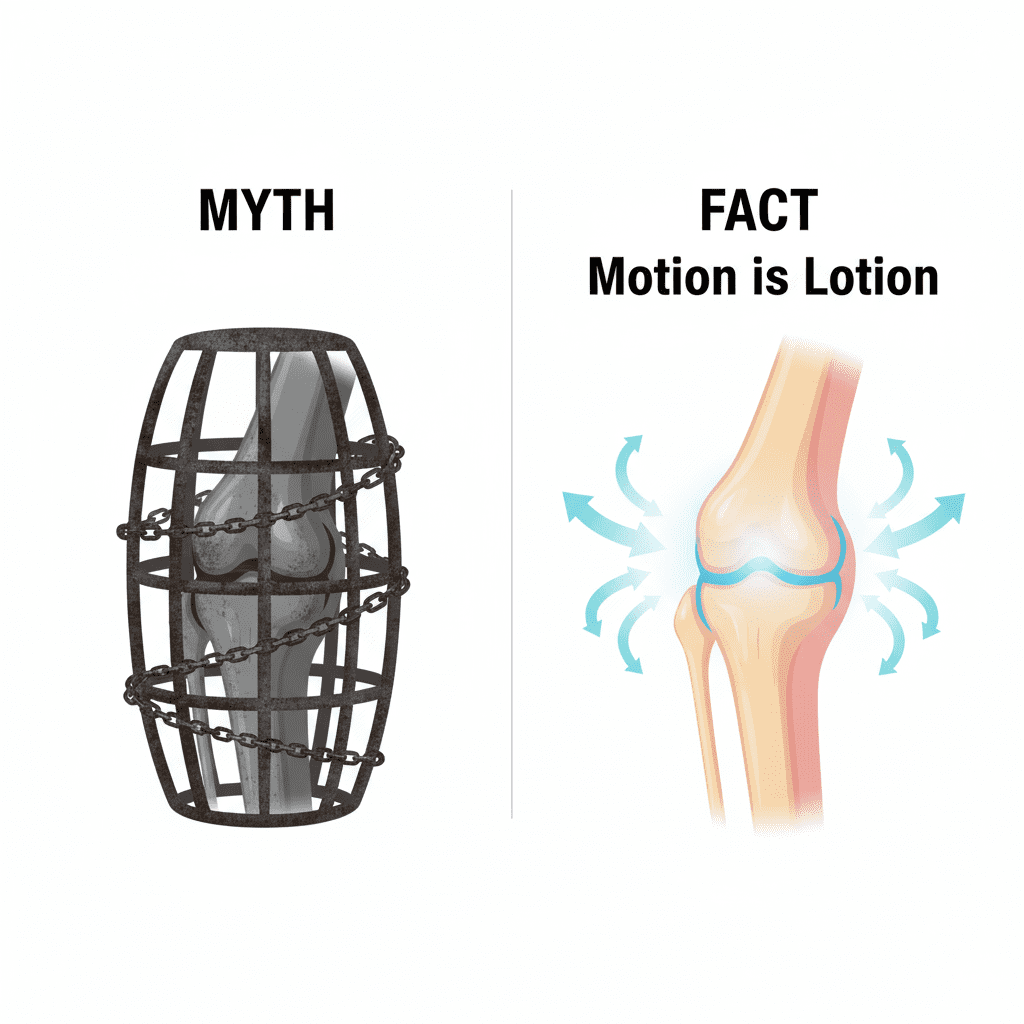
Myth: “It’s tendon-‘itis’, so I need to pop anti-inflammatories and ice it constantly.”
Fact: This is the single biggest misunderstanding about this condition. While there might be a tiny bit of inflammation right at the beginning, chronic tendon issues are rarely about inflammation. The “-itis” is misleading.
The real issue is what we call tendin-‘opathy’—a change in the tendon’s cells and structure due to being overloaded.
Think of it like a rope that’s become frayed from too much stress. The solution isn’t to just cool it down; the real solution is to strengthen the rope’s fibers. This is a crucial part of any effective patellar tendonitis treatment.
Myth: “I should completely stop all exercise until the pain is 100% gone.”
Fact: While it seems logical, complete and prolonged rest can be one of the worst things you can do.
Total rest can actually weaken the tendon and the crucial supporting muscles around it (like your quads and glutes).
When you finally return to activity, that weaker tendon is even more susceptible to being overloaded again. The cycle continues.
The key isn’t no load, but the right load.
I vividly remember a time when. My mornings were filled with dread. One specific day, I realized… and that was the turning point that led me to discover…
This journey taught me that understanding the ‘why’ behind anterior knee pain causes is more powerful than any quick fix. It’s about working with your body, not against it.
The 3-Phase Fix for a Frustrated Patellar Tendon
Recovery isn’t a single step; it’s a process. We need to calm the tendon down, then build it back up stronger than before.
Here is the simple, evidence-based framework we use to guide our patients back to full strength.
Phase 1: Calm the Tendon with Isometrics
Your tendon is angry and sensitive right now. Our first job is to speak its language and tell it to calm down.
The best way to do this is with isometrics.
Isometrics are exercises where you contract a muscle without moving the joint. Think of pushing against an immovable object.
Why it works: Scientific studies have shown that holding an isometric quad contraction for about 45 seconds can produce a significant analgesic (pain-relieving) effect that can last for hours. It’s like a natural painkiller that also primes the tendon for healing.
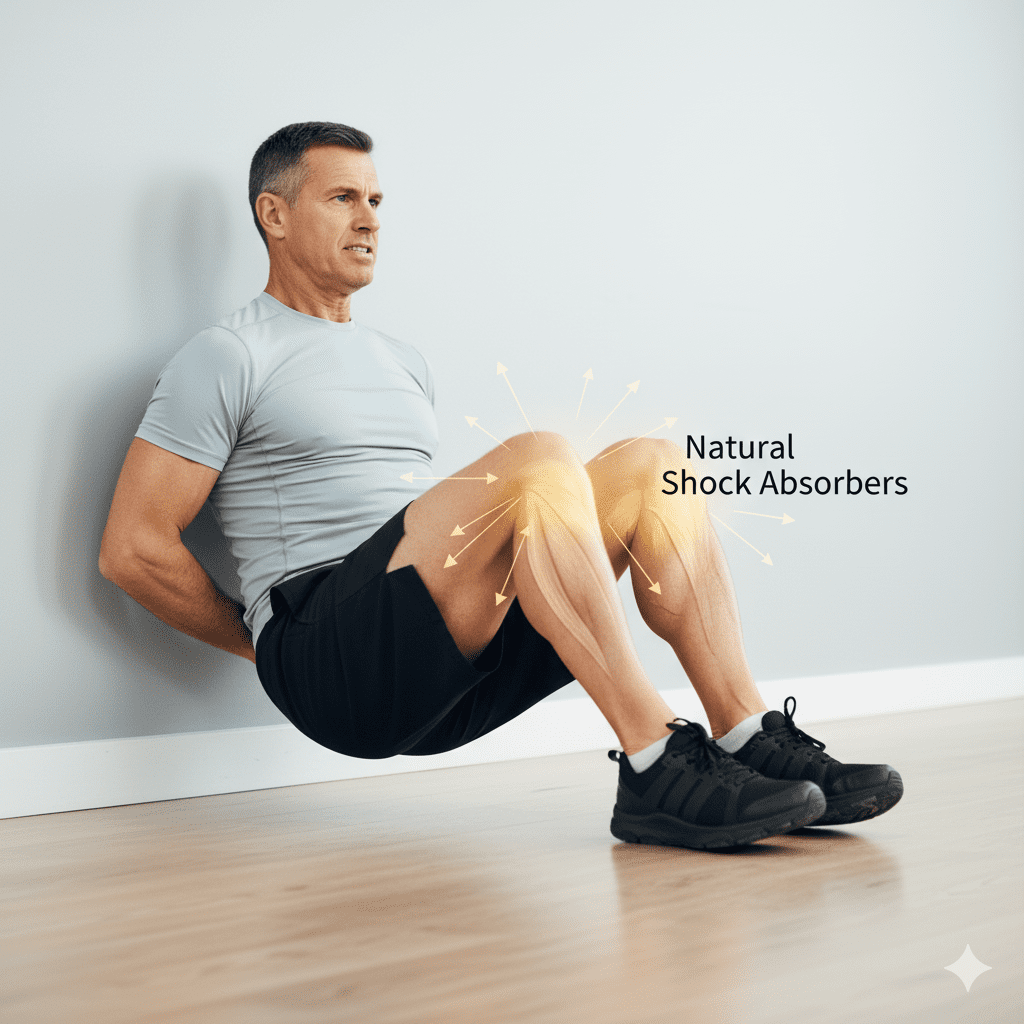
The Go-To Exercise: The Wall Sit
This is one of the most effective jumper’s knee exercises to start with.
- Stand with your back against a smooth wall.
- Walk your feet out and slide your back down the wall until your knees are bent.
- Crucially, find an angle that is comfortable. You don’t need to go deep to a 90-degree squat. Find a shallower angle where you feel your quad muscles working but your knee pain is minimal (less than a 3/10 on the pain scale).
- Hold this position. Don’t move. Just hold and breathe.
- Duration: Aim for a 45-second hold.
- Repetitions: Complete 4-5 sets, with a minute of rest in between.
Do this 1-2 times a day, especially before an activity that might normally cause pain.
Phase 2: Rebuild Strength with Heavy, Slow Resistance
Once the pain has settled, it’s time to rebuild.
Tendons love—and respond to—heavy, slow loads. This type of stimulus is what tells the cells within your tendon to lay down new, strong, healthy collagen fibers.
This is the phase where we truly begin to fix patellar tendonitis.
Why it works: Fast, bouncy movements rely on the tendon to act like a spring. Slow, controlled movements shift the load to the muscle (your quadriceps), allowing the tendon to adapt to heavy loads without being strained.
The Go-To Exercises:
1. Slow-Tempo Leg Press:
- Use a leg press machine at the gym. Start with a light weight you can easily control.
- Focus on the tempo: Take 3-4 seconds to lower the weight, pause for 1 second, and take 3-4 seconds to push back up.
- The movement should be smooth and deliberate. No bouncing.
- Aim for 3-4 sets of 8-12 repetitions. The weight should feel challenging by the last couple of reps.
2. Spanish Squats:
- This is a fantastic option if you don’t have a leg press.
- Loop a heavy resistance band around a sturdy anchor (like a squat rack).
- Step into the loop with both legs and pull it up so it sits snugly in the crease behind your knees.
- Walk backward until there’s strong tension on the band. The band will try to pull your shins forward.
- Now, perform a squat. The band’s counter-tension allows you to sit your hips straight down while keeping your shins vertical, taking stress off the patellar tendon and placing it squarely on the quads.
- Use the same slow tempo: 3-4 seconds down, 1-second pause, 3-4 seconds up.
- Aim for 3-4 sets of 8-12 repetitions. This is a surprisingly good solution for knee pain when squatting.
Phase 3: Re-learn to Store Energy with Plyometrics
Your tendon is now calm and strong. The final step is to retrain its “spring-like” function.
This is what allows you to run, jump, and change direction without pain. We must reintroduce this function gradually.
Why it works: Plyometrics train the tendon’s ability to absorb and release energy efficiently. Skipping this step is why many people feel better with simple strengthening but experience a flare-up the moment they return to their sport.
The Go-To Exercises (Start small and progress):
- Pogo Hops:
- Start by simply hopping on the spot, like you’re jumping rope without the rope.
- Keep your knees relatively straight and focus on being light and springy on the balls of your feet.
- Start with just 3 sets of 20-30 seconds.
- Small Box Jumps:
- Find a very small box or step (6-12 inches).
- Jump onto the box, focusing on a soft, quiet landing.
- Step down, don’t jump down. This is key to managing the load.
- Start with 3 sets of 5-8 jumps.
As you get stronger and remain pain-free, you can gradually increase the height, duration, or intensity of these exercises.
The Golden Rule: How to Know You’re Doing Too Much (Or Too Little)
This is your most important tool for self-management.
The 24-Hour Pain Rule.
It’s simple:
- During Exercise: It’s okay to feel a very low level of pain (a 2-3 out of 10). This often means you’re loading the tendon in a productive way. If the pain gets worse as you go, stop.
- After Exercise & The Next Morning: Your pain should NOT be worse the morning after your exercises. If you wake up and your knee is more sore and stiff than usual, you did too much the day before.
If that happens, don’t panic. Just reduce the weight, reps, or intensity in your next session.
This rule empowers you to find your tendon’s unique tolerance level and progress safely without setbacks. It’s the core principle behind any successful patellar tendonitis treatment.
Your Knee Pain Doesn’t Have to Be a Life Sentence

That nagging pain below your kneecap isn’t something you just have to live with.
It’s a signal that your tendon’s capacity has been exceeded by the demands you’re placing on it.
The solution isn’t to stop moving. It’s to build its capacity back up.
By understanding the difference between tendonitis vs tendinopathy, calming the tendon with isometrics, rebuilding it with slow and heavy loads, and then re-learning to be explosive, you can take back control.
Small, consistent habits lead to big, lasting results. Start with Phase 1 today and listen to your body. Your knees will thank you for it.
Ready to get a plan that’s tailored specifically to your body and your goals? If you’re tired of guessing, we’re here to help. Visit physiogain to book your personalized virtual or in-person consultation today.
Which phase do you think you’re in right now? Share your experience in the comments below!